Step 1: Add profile directly from linkedin or sales navigator to ZELIQ
Go to your prospects Linkedin account.
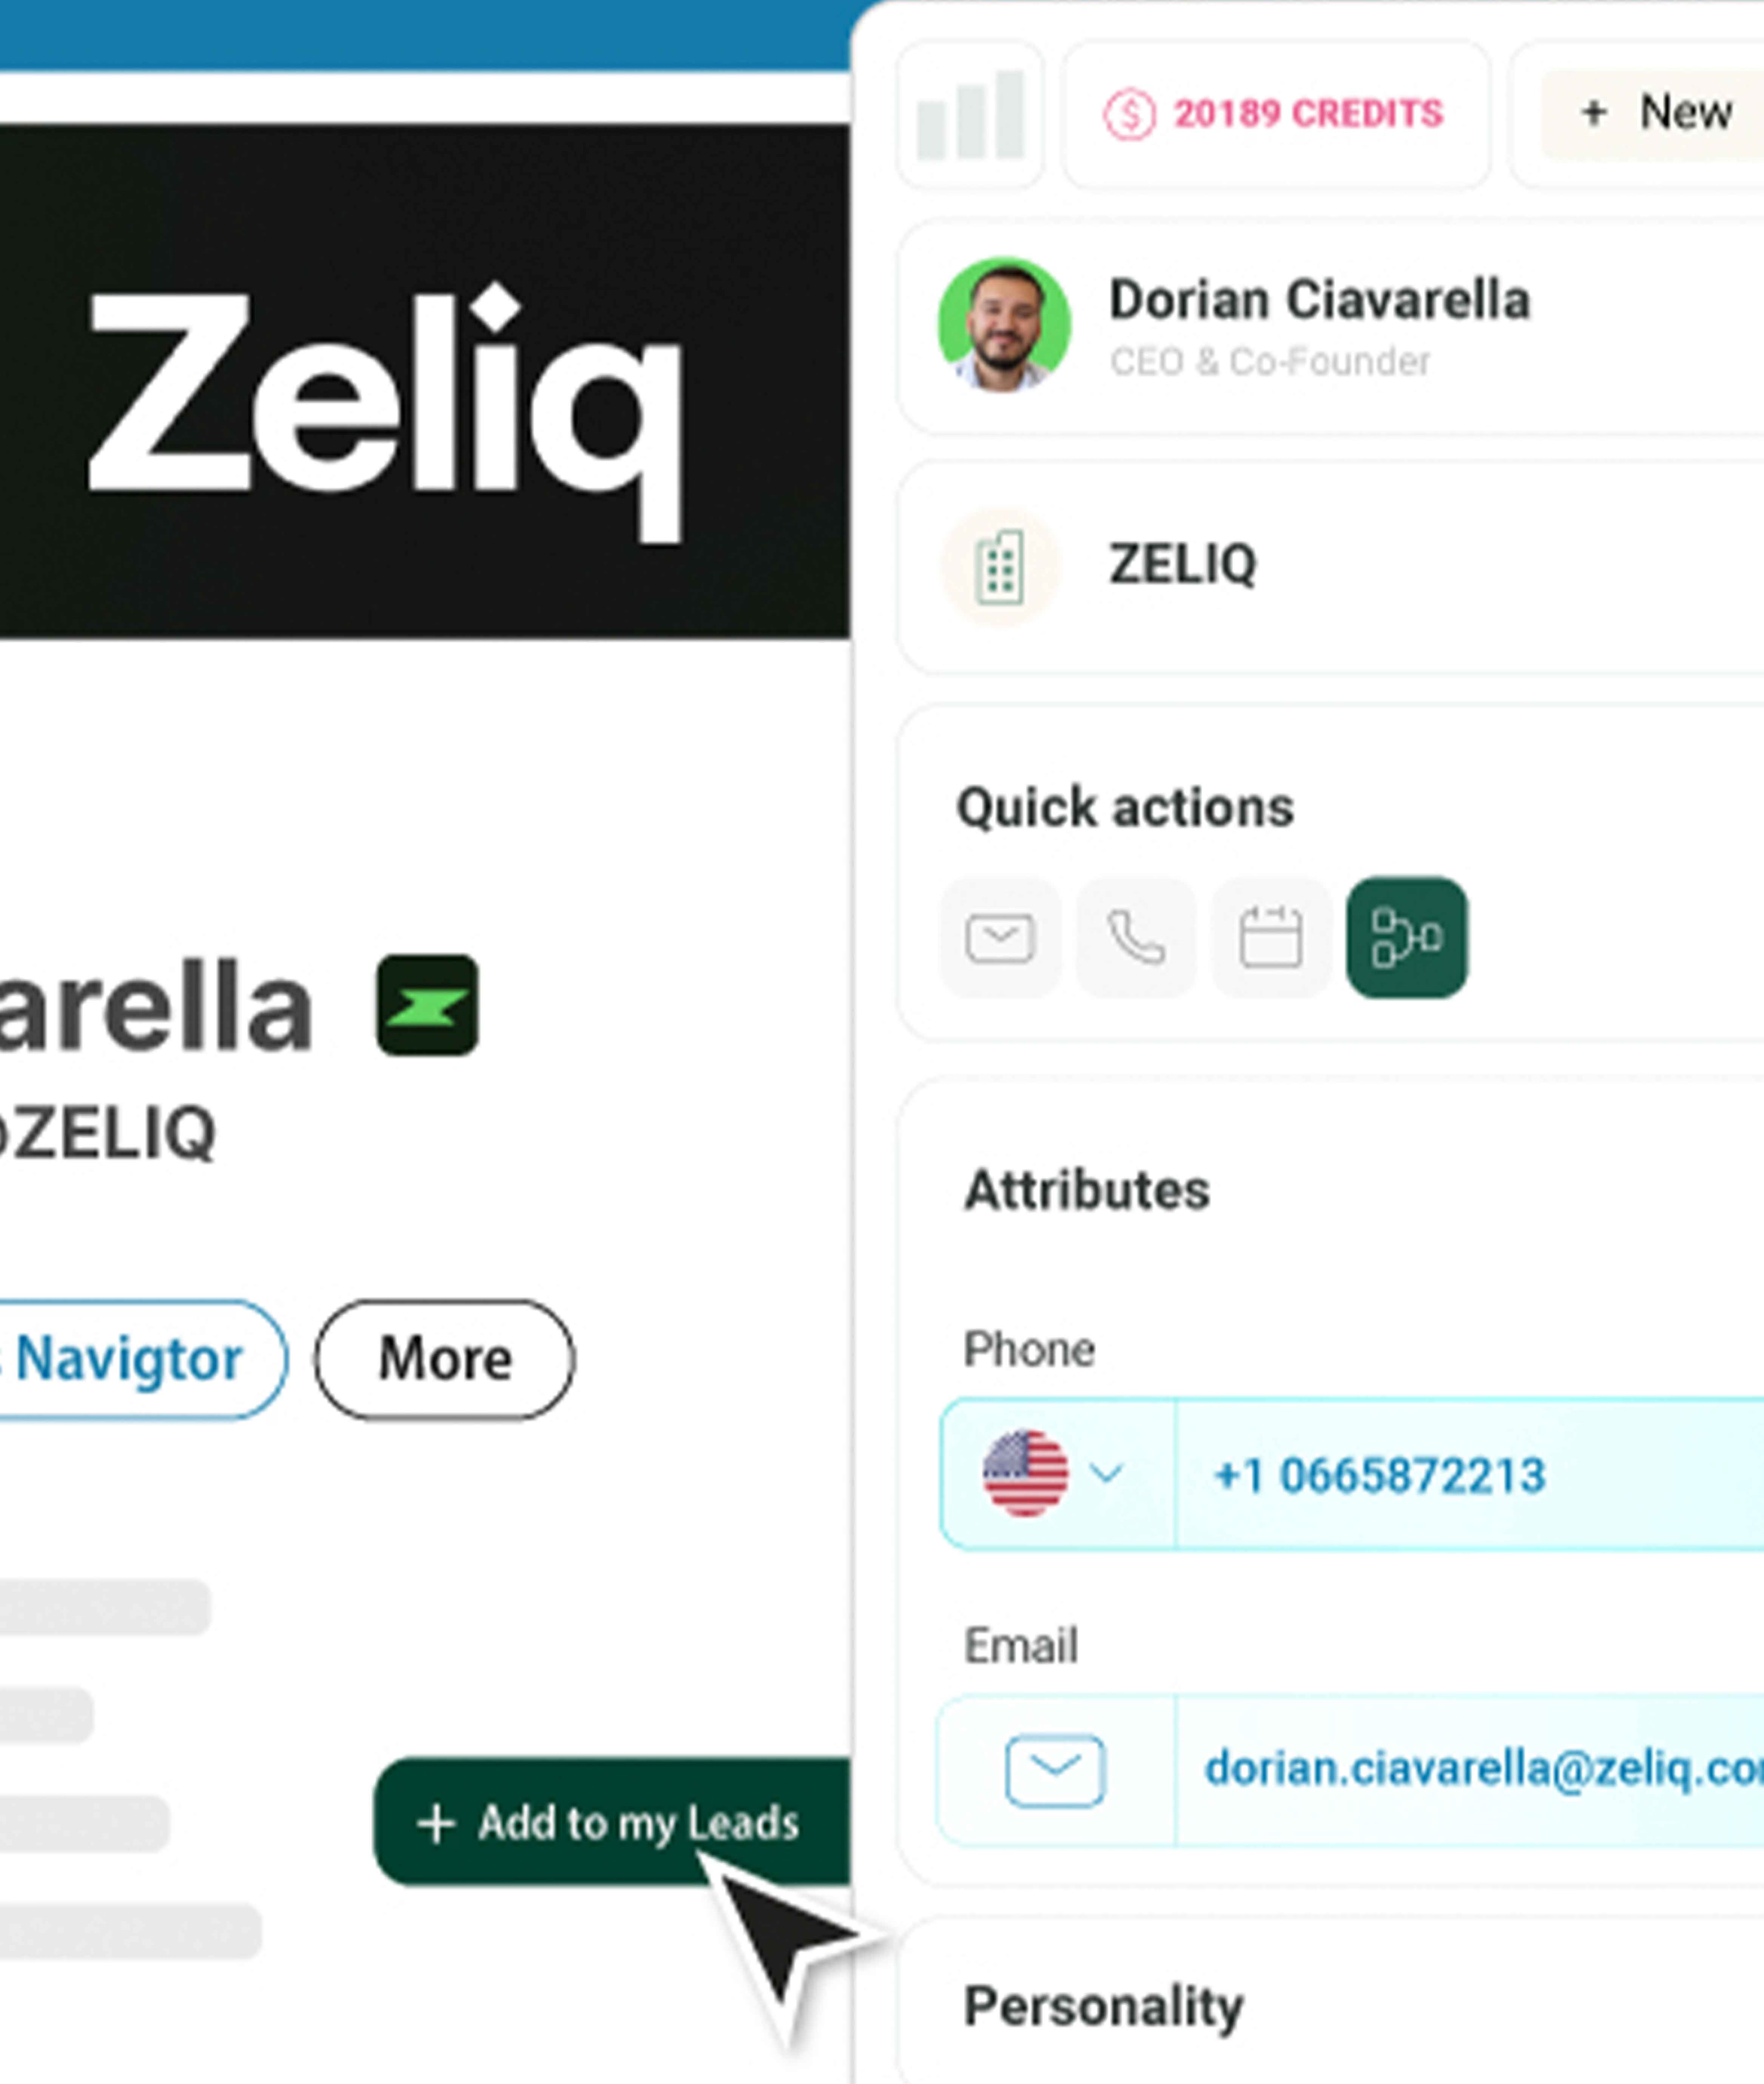
Add prospects from Linkedin and Sales Navigator to ZELIQ in 1-Click by clicking a green “add to zeliq button”.
👉🏼Psst, sign up to ZELIQ to access email addresses via the LinkedIn Extension - it’s free.
%3Aformat(webp).webp)
Step 2: Access profile information & contacts as a pop up
Once the contact has been added you can immediately access their information such as attributes, personality analysis, contact owner, notes & have a link for a quick action.
What else can you see on the side panel?
✅ The leads name and company at the top
✅ And also other mutuals that work in the company
%3Aformat(webp).webp)
Step 3: Add prospects in bulk through search page from Linkedin and sales navigator
You can also add them as a list by clicking on “select all” or by checking the people that you want to add into ZELIQ.
%3Aformat(webp).webp)
Step 4: Enrich your leads directly from Linkedin
Find your contact’s email and phone number directly from our Linkedin pop up.
Enjoy our email enrichment for free with waterfall workflow, for the freshest data.
%3Aformat(webp).webp)
Step 5: Know which contact is already in the CRM
Whenever someone is added into ZELIQ already, their name would be bolded in emerald green with a Z symbol indicating they’re already inside ZELIQ.
If you synchronise your CRM with ZELIQ, you’ll also be able to identify who is already inside your CRM.
%3Aformat(webp).webp)
Step 6: Select your ICP to be added on ZELIQ from company page
Not only that you can add several profiles all at once from a list but you can also add them from the “people” section of a company page.
This allows you to select people who are your ICP, keeping ZELIQ & your CRM clean and organised.
%3Aformat(webp).webp)
Step 7: Assign leads directly from Linkedin & SN
Once a lead is added into ZELIQ you can either assign it to yourself or to your teammate directly on their profile.
For leads who are already inside ZELIQ, you can see whom it was assigned to and re assign them to another person.
%3Aformat(webp).webp)
Prospect & connect with our new LinkedIn Extension, streamline your outreach, cut costs and keep your CRM organised!
🎥 And if you're a more visual learner, check out our youtube tutorial here!
Enter the future of lead gen

Table of contents
Placeholder Title
Table of contents
Placeholder Title
Placeholder Title
Download our full case study ebook!


